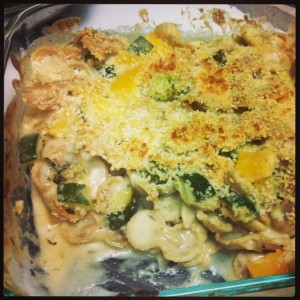
Truffle Veggie Mac and Cheese

Oh. My. God. This recipe is soooo good and soooo easy. It truly is quick gourmet food. This would be a great way to easily impress a bunch of people. Present it with a French accent and REALLY impress them.

“For zee entree – macaroni et fromage.”

If you ever make mac and cheese at home, you’ll never understand why people buy the boxed stuff.  It is so easy. Step 1. Boil some pasta. Step 2. Make a roux. (fancy French word) 3. Add cheese and pour over pasta. Voila! It’s that easy. And then you can impress people that you know the word roux. Don’t let the French words intimidate you. A roux is just some fat (think oil and butter) heated up and whisked with flour. That’s it! It helps make your milk and cheese the thick, creamy consistency that comes to mind when we think of macaroni and cheese. And homemade is far superior to the powdered junk.

This recipe isn’t exactly healthy, but the fact that half of the pasta is subbed out for vegetables not only makes you feel *less* guilty, but adds a nice added layer of texture. Plus, it uses whole wheat pasta and olive oil instead of butter.  So while it still tastes incredibly rich and delicious it is slightly better for you than most mac and cheese.

Adapted from The Comfort of Cooking 
1380565_10101750806766149_1241242200_n1 cup broccoli florets, chopped into small chunks

1 red pepper, diced (I used yellow, but I would use red for color)

1 zucchini, quartered and diced

2 cups whole wheat pasta

1/4 cup olive oil

1 garlic clove, minced

3 Tbsp. all-purpose flour

1 1/2 cups milk

2 cups (8 oz.) shredded Truffle Cheddar (I use Hook’s. If you can get it, you should.)

1/2 tsp thyme

Salt and pepper, to taste

2 Tbsp panko breadcrumbs

Heat oven to 400 degrees (Farenheit).  Put vegetables in a pan large enough to hold the veggies plus the pasta cooked. With just the vegetables in the pan, drizzle with some olive oil. Add thyme in addition to salt and pepper to taste. Roast in the oven for approximately 20 minutes.

While vegetables are roasting, boil a large pot of water. Add 2 cups of pasta and cook until al dente. Strain.

In a saucepan, heat 1/4 cup of oil in the pan, add garlic and cook until fragrant (only a minute). Add flour and whisk vigorously. This will thicken quite fast; you only need to cook for a minute. Gradually whisk in milk, 1/2 cup at a time. Continue to whisk once all the milk is added until slightly thickened. Remove from heat and whisk in cheese. (It is important to do this off of the heat so it doesn’t scorch.)

Pour the cooked pasta into the dish with roasted vegetables and mix. Pour cheese mixture on top. Top with breadcrumbs and place under broiler in your oven for approximately 4-5 minutes.

Let cool for 8-10 minutes before serving.
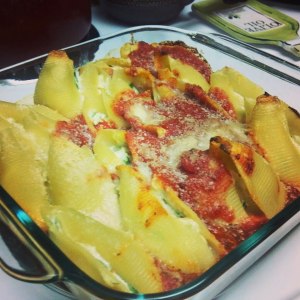
Spinach Ricotta Stuffed Shells

Remember how I said I was going to make more vegetarian food?  Here’s a doozy.

When I saw this recipe, I knew I had to made it. Stuffed shells sound and seem like a fancy meal, but they are actually quite easy. Shells are quite forgiving. Even if you tear one, you can just stuff it with some delicious filling and bake away – no one will even notice! And although this is a special-looking dish, it is easy enough to make any night of the week, rounded out with a nice salad.

Adapted from Spoon Fork Bacon

approximately 25 jumbo pasta shells

2 Tbls olive oil 0-1

1 1/2 cup marinara sauce

1/3 cup Parmesan, grated

1 to 1 1/2 cups fresh spinach, washed and torn into pieces

2 cups part-skim ricotta

1 egg, lightly beaten

1 shallot, minced

1 tsp garlic powder

1 tablespoon basil, minced

salt and pepper to taste

Preheat oven to 350°F. Pour marinara into the bottom of a 8 x 8 pan.

Bring a large pot of water to boil. Add salt, pasta and stir. Cook the pasta until al dente, according to box instructions. Drain pasta and toss with olive oil while still warm.

In a large bowl, mix ricotta, egg, shallot, basil, garlic powder, and a pinch of salt and pepper. Using a spoon, scoop a small about (about a Tablespoon) into each shell, then place shell into the baking dish, on top of sauce. Top with parmesan cheese.

Lightly spray a piece of aluminum foil large enough to cover baking pan. Cover pan with sprayed side down, facing the shells. Tightly cover the pan and bake for 20 minutes. Then, remove foil and continue to bake for approximately 5 more minutes or until parmesan bubbles. Remove from oven and let set for at least 5 minutes before serving.

Cheddar Chive Biscuits

The other day I was craving something salty and delicious.  My stomach had been bothering me and I wanted something that was easy on the tummy and tasty at the same time.  I also wanted that was quick and easy to make, since I wasn’t feeling too well.

I spent some time online looking for recipes.  I browsed my favorite website for recipes, foodgawker.com.  Page, after page, there were lots of different options.   However, a recipe for cheese biscuits caught my eye.  I had some leftover jambalaya in the fridge, and I thought the leftover biscuits would be delicious with it.

However, as usual, I didn’t have exactly the same ingredients.  I ended up doing what I always do, working with what I have!  I added a good amount of cheese and some fresh chives from my small garden.  I also didn’t have any buttermilk on hand, so I made some at home!  If you don’t have buttermilk at home, here’s an easy way to make your own at home.  Just mix one Tablespoon of vinegar per cup of milk.  Let this mixture sit for approximately 5 minutes.  Viola!  Buttermilk!

Adapted from Thibeault’s Table recipe

1 cup of flour

1 1/2 tsp of baking powder

1/4 tsp of salt

1/4 cup of butter

1/2 cup of buttermilk

3/4 cup shredded cheddar cheese

2 Tbl chopped chives

Salt and pepper to taste

Preheat oven to 450 degrees.  Line a cookie sheet with parchment paper or spray with cooking spray.

Mix flour, baking powder and salt.  Cut in the butter.  To see directions on how to do this, see my post on Raspberry Rhubarb Crumble.  Add salt and pepper.  Stir in milk, cheese, and chives with a fork.  Pat together dough with hands.  Do not over mix batter.  It should still be slightly lumpy.

Drop batter into 1 1/2 inch rounds on prepared cookie sheet.  Bake for approximately 12 to 15 minutes.  Enjoy!

Red Enchiladas

I had an Oops moment recently.  I went to the store to buy some enchilada sauce.  Mainly because I love mexican food, but I’m a little shy about making it.  So when I cook, I take some short cuts.  This includes buying enchilada sauce rather than trying to make my own.

Unfortunately, when I got home to make the enchiladas, I noticed that I had bought red chile sauce instead of enchilada sauce.  I admit, I have very little knowledge of how red chile sauce is different from enchilada sauce, but I looked at the ingredients and realized that red chile sauce is essentially a puree of chile peppers.  So, I decided to add a little of this, a dash of that, and see what I ended up with.  Luckily, the results were excellent!  I know this does not have any tomato in it, so it is not your traditional enchilada sauce.  However, it is mighty tasty.

Filling:

1 lb of ground meat for filling (I used turkey)

1 small onion, chopped

1 Tbl of oil

2 cloves of garlic, minced

2 tsp cumin

1 cup of shredded cheese (I used cheddar)

2/3 cup of red chile sauce

Topping:

1 (28 ounce) can of red chile sauce

1 1/2 Tbl cumin

1 tsp dried oregano

2 tsp garlic salt

1 cup of shredded cheese (I used cheddar)

corn tortillas

Get a 9×11 pan ready to place the assembled enchiladas.  Preheat oven to 350 degrees.  Warm up the 28 ounce can of red chile sauce on low in a saucepan.

In a separate pan, heat oil in a pan on medium.  Add onion and garlic.  Heat through until fragrant, a few minutes.  Then add ground turkey, cumin, and add 2/3 cup of red chile sauce from saucepan.  Let this simmer until all ingredients are nearly cooked through.

While meat is simmering, season remaining red chile sauce.  Add cumin, oregano, garlic salt, salt and pepper to taste to the sauce.  Only warm through, then remove the sauce from heat.  Pour half of the sauce into a shallow dish to dip tortillas.

When meat is nearly ready, remove from heat.  To assemble enchiladas, take a tortilla.  Dip into seasoned sauce.   Then, place meat mixture in the center of the tortilla.  Sprinkle with cheese.  Roll and place, seam down, in the 9×11 pan.  Continue until meat mixture is finished and tortillas fill the pan.  Pour remaining red chile sauce over enchiladas.  Sprinkle with remaining cheese.

Place enchiladas in the oven for approximately 15 minutes or until cheese is bubbling.  Let cool slightly before serving.  Enjoy!

Leek and Rosemary Quiche

WOW!  That is all I have to say about this recipe.  I like quiche, but it has never been one of my favorite foods.  In fact, quiche has always had a baby-shower-esque feel for me.  You eat it because its there, and someone is usually celebrating something.  This quiche recipe has made me rethink my previous analysis.

Ironically, I made this dish as part of our Thanksgiving feast for a vegetarian friend.  I altered the Luna Cafe’s recipe for Leek, Cheddar, and Rosemary Tart.  You can find the original recipe here.  Luckily, Luna Cafe has a few great hints to make cooking quiche pain-free and effortless.  The two main things to know are: 1) Quiche is done when it reaches 160 degrees internal temperature.  Do not overcook!  Custard will curdle at 180 degrees. 2) You will know when to take the quiche out of the oven by the size of the indent in the middle.  This means when the outside begins to set, it will raise around the edges, but not in the middle.  This forms an indent in the middle of the quiche.  When the indent is approximately 3-4 inches from the outside, it is done!  It is safe to take the quiche out of the oven at this point, because it will continue to cook after you take it out of the oven.

Recipe (adapted from Luna’ Cafe’s Leek, Cheddar and Rosemary Tart)

1 prepared pie crust rolled into a quiche pan

2 Tablespoons unsalted butter

2 medium leeks, trimmed and sliced crosswise

2 teaspoons of minced garlic

2 Tablespoons chopped fresh chives

2 teaspoons minced fresh rosemary

3 large eggs

1 1/2 cups half and half

2 cups shredded cheddar cheese

1/3 cup parmesan cheese

salt and pepper to taste

I started by par baking a pie crust.  Par baking is simply partially cooking an item.  You need to do this with the pie crust, otherwise it will not cook properly when you pour the custard over the crust.  I did this by placing a pre-made crust in a greased quiche pan and poking holes in the bottom.  Then I cooked it for about 10 minutes at 350 degrees.  After doing this, take the crust out of the oven and sprinkle lightly with shredded cheese.  This will help keep the crust crispy.

The next step is to cook the veggies.  Melt butter in a pan.  Then add chopped leeks and garlic.  Season with salt and pepper.  Cook until translucent.  Add chopped chives and rosemary and remove mixture from heat.

In a mixing bowl, whisk eggs.  Whisk in half and half.  Season egg mixture with salt and pepper.  Mix cheeses together.  Add a small handful of the cheese mix into the egg mixture and whisk.

Pour the veggie mixture over the crust.  Then pour egg mixture over the leek mixture.  Make sure there is approximately 1/4 to 1/2 inch room at the top of the pan because the egg mixture WILL rise when cooking.  Finally, top with leftover cheese.  Bake quiche at 350 degrees for approximately 35-45 minutes.  Let the quiche cool for about 10 minutes before serving.